Skip to content
Site Title
Menu
About
Contact
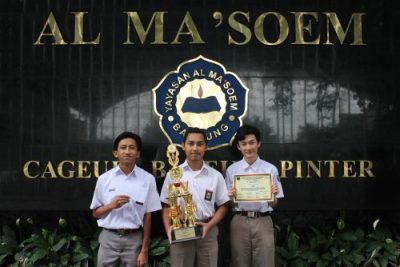
Boarding Al Ma’soem Cetak Santri Berprestasi
November 1, 2017
First blog post
August 6, 2017
August 6, 2017
Another blog post
August 6, 2017
August 6, 2017
And another blog post
August 6, 2017
August 6, 2017
Another blog post two
August 6, 2017
August 6, 2017
Another blog post three
August 6, 2017
August 6, 2017
Privacy & Cookies: This site uses cookies. By continuing to use this website, you agree to their use.
To find out more, including how to control cookies, see here:
Cookie Policy
Subscribe
Subscribed
Site Title
Sign me up
Already have a WordPress.com account?
Log in now.
Site Title
Customize
Subscribe
Subscribed
Sign up
Log in
Report this content
View site in Reader
Manage subscriptions
Collapse this bar